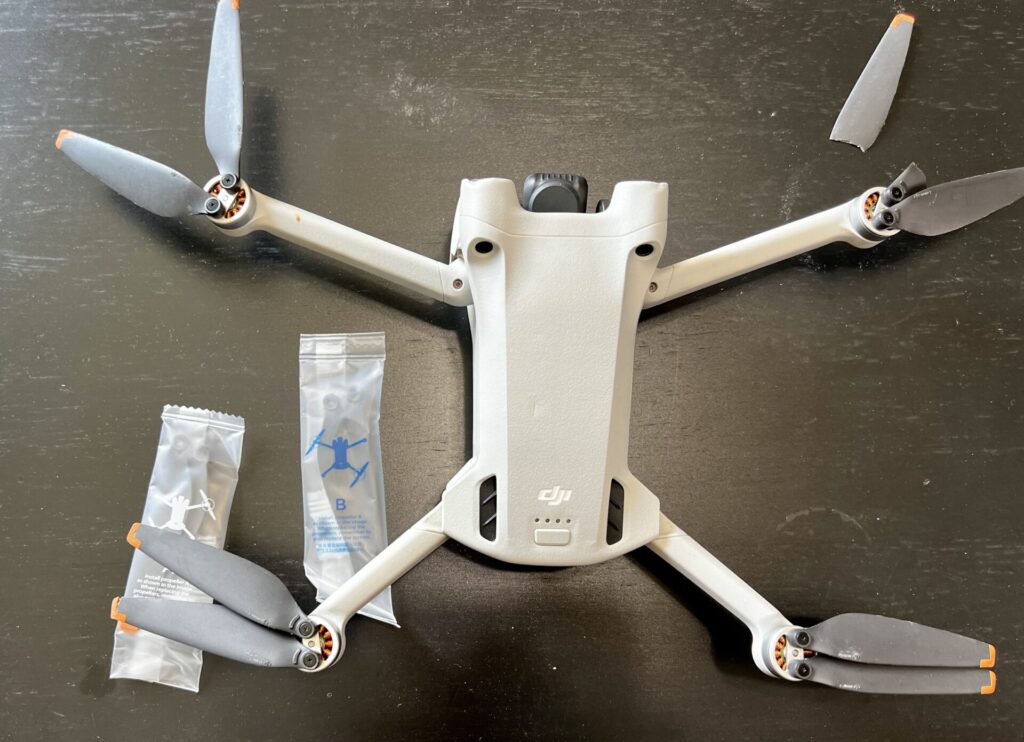
Crashing your drone sucks. There really isn’t another way to put it.
Luckily, most problems can be fixed with a little know-how and it feels a little better if we can do it together.

In this blog post, read on for helpful tips to replace your drone propellors then key calibrations before taking a test flight (with helpful tips to make sure that first flight goes well).
Assess How Badly You Crashed Your Drone
First things first. How bad is the damage?
If it’s just propellors that need to be replaced (and calibrations you shouldn’t skip), then read on for that…
Essential Repair Kit
You’ll need four crucial items to start your repair journey:
- Your Drone and Controller: The main characters in this story.
- Spare Propellers: Most newer DJI drones come with spares. Find yours.
- The Correct Tools: Depending on your drone, a small tool might be necessary.
- A Charged Battery: If yours is dead, get it charging now.
If you’re looking for parts, I’ll be honest – yes, I know lots of people who’ve bought spare parts online and have had successful stories. I also know of people that bought knock off parts and DID NOT have a good experience.
Whatever you choice is (and hopefully all you need is the repair tool) – you can find most things on Amazon. Don’t forget your DJI Drone should already come with a tool (it works great!), but it’s pretty easy to misplace it.
Changing Propellers
Newer DJI drones simplify identifying which propeller matches which side. Look for indicators on the propellers themselves to ensure correct placement.
Remember, incorrect installation might prevent your drone from taking off (I’ve done this before with the DJI FPV drone), but don’t panic…
Just double-check your work. For instance, the Mavic Mini 3 Pro allows for easy swaps. Ensure the DJI logo faces the right way, and the propellers match their respective partners.
Want to FIX your propellors WITH me? Don’t forget there is a full video tutorial taking you through this step-by-step.
Calibrating Your Drone
Consider calibration the relaxation massage your drone needs post-crash. It helps reset and ensure everything’s functioning as it should before you take to the skies again.
Start with a standard calibration (i.e. the “spinning your drone one), then move on to the gimbal for good measure, especially if you plan to record or capture photos.
Never calibrated your drone? This video tutorial will help you out!
The Test Flight
Before taking your drone out for a proper flight, conduct a test in a safe, controlled environment.
And definitely DO NOT do what most people do – which is message me about how they “fixed it” then traveled with it and had their first flight while traveling and then tell me “I don’t understand why it didn’t work”.
Don’t be that guy.
Keep it low—no higher than a few feet off the ground. This test isn’t about pushing limits; it’s about ensuring everything is in working order.
One additional thing I do? I not only make sure it gets off the ground, but I leave it there. For a really long time (at least a few minutes) and just watch it. I make sure it’s doesn’t act weird and I give it TIME to tell me if something is still wrong.
Learn with me!
In a step-by-step video courses, join me in my drone course!
No matter where you are in your journey (beginner or advanced) I’m here to help you master your drone!
Recap
What happened today? We…
- Changed the propellors
- Calibrated the drone in more than the standard way
- Did a safety test
After this my drone was back in business (literally – because I love making money off my drones and YOU SHOULD, TOO with my advanced course).
Remember, the key indicators on propellers, thorough calibration, and a cautious test flight are essential steps in ensuring your drone’s recovery.